Homemade Sushi
If you follow me on Snapchat (sweetmonday) or Instagram, you may have seen that we spent our Saturday night making sushi! Sushi, and Japanese food in general, are our favourite cuisine. We loved Japanese food whilst we lived in Australia, and then even more so when we traveled Japan. Sashimi, nigiri and sushi rolls, are all amazing in my eyes. I could quite literally eat it every day and not get tired of it.
Whilst in Japan we really treated ourselves to just about every kind of dish the country had to offer. We are such foodies anyway, that the trip was right up there with the best thing we've ever done! In fact, I blogged a little food diary from our time there which you can see here.
For my birthday last month, Stew surprised me with a sushi making kit that he bought from the Japan Centre in Piccadilly Circus. I can't tell you how baffled I was when I saw it wrapped up. I had no idea what it would be and when I opened it I literally lit up! Food is most definitely the way to my heart.
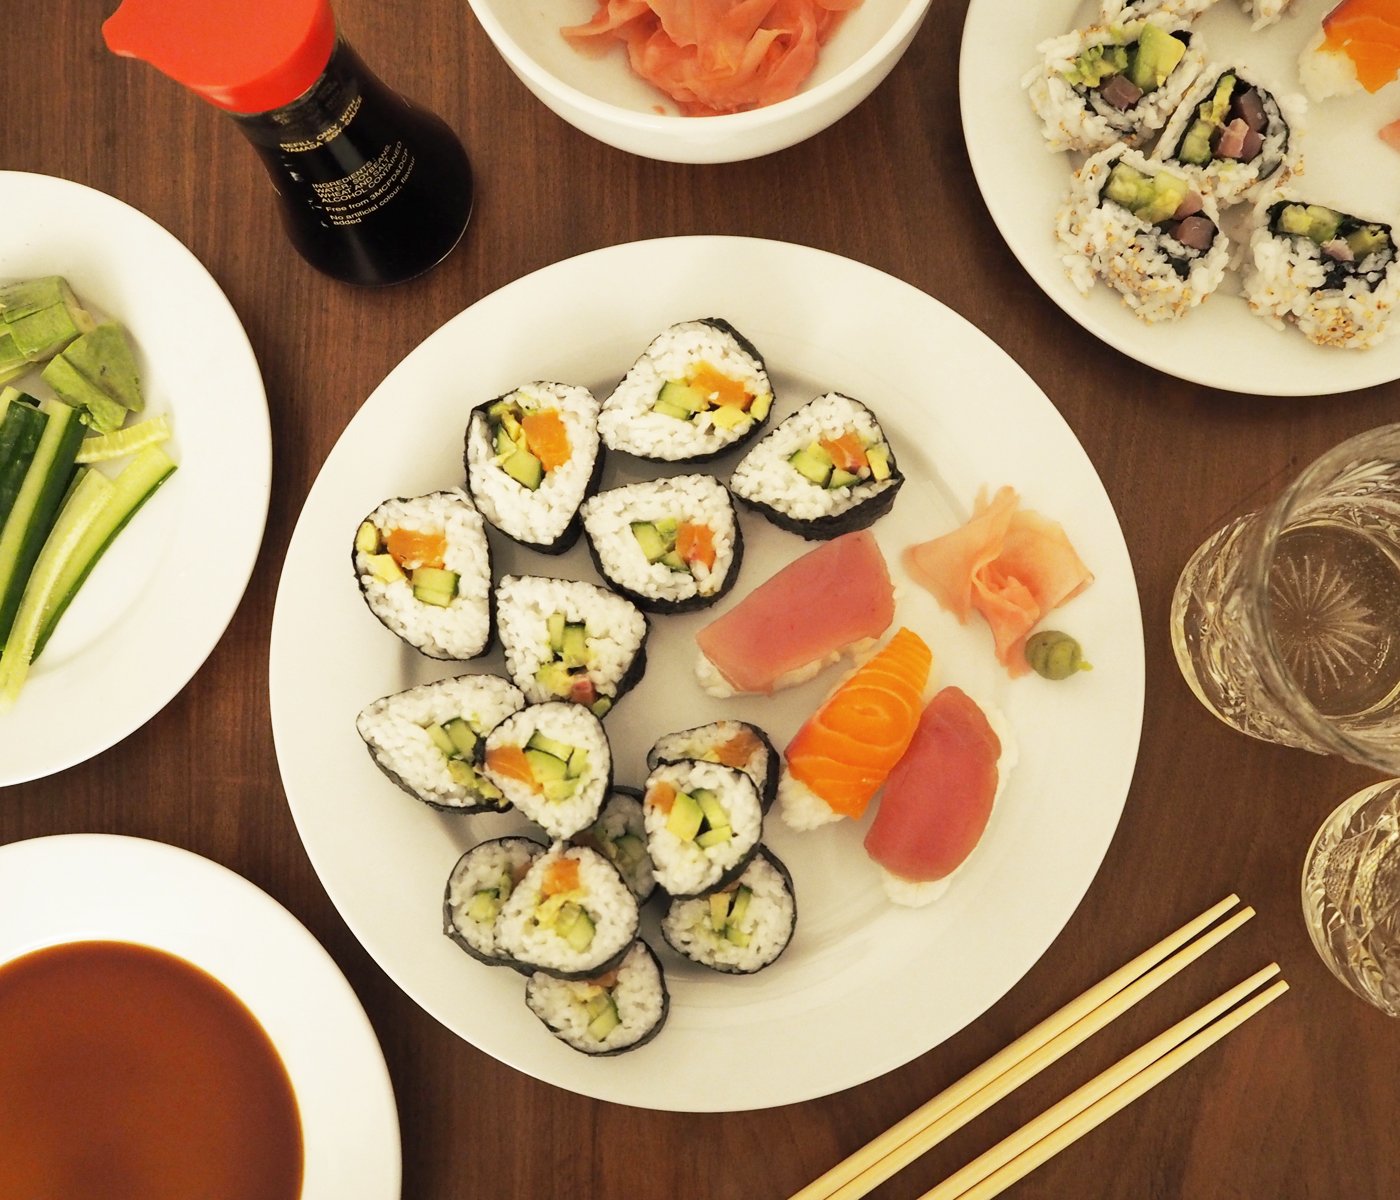
Anyway, enough of me babbling on. So the sushi making kit itself includes seaweed, sushi rice, sushi seasoning, soy sauce, sesame seeds, ginger, wasabi, chop sticks and the sushi mat to roll it with. Priced at just over £20, it's an absolute bargain! There is enough rice and seaweed to make countless sushi rolls... Well 10. But that's 10 absolutely huge rolls. We used 3 of them and made some nigiri and we had way too much food. So it's great value for money.
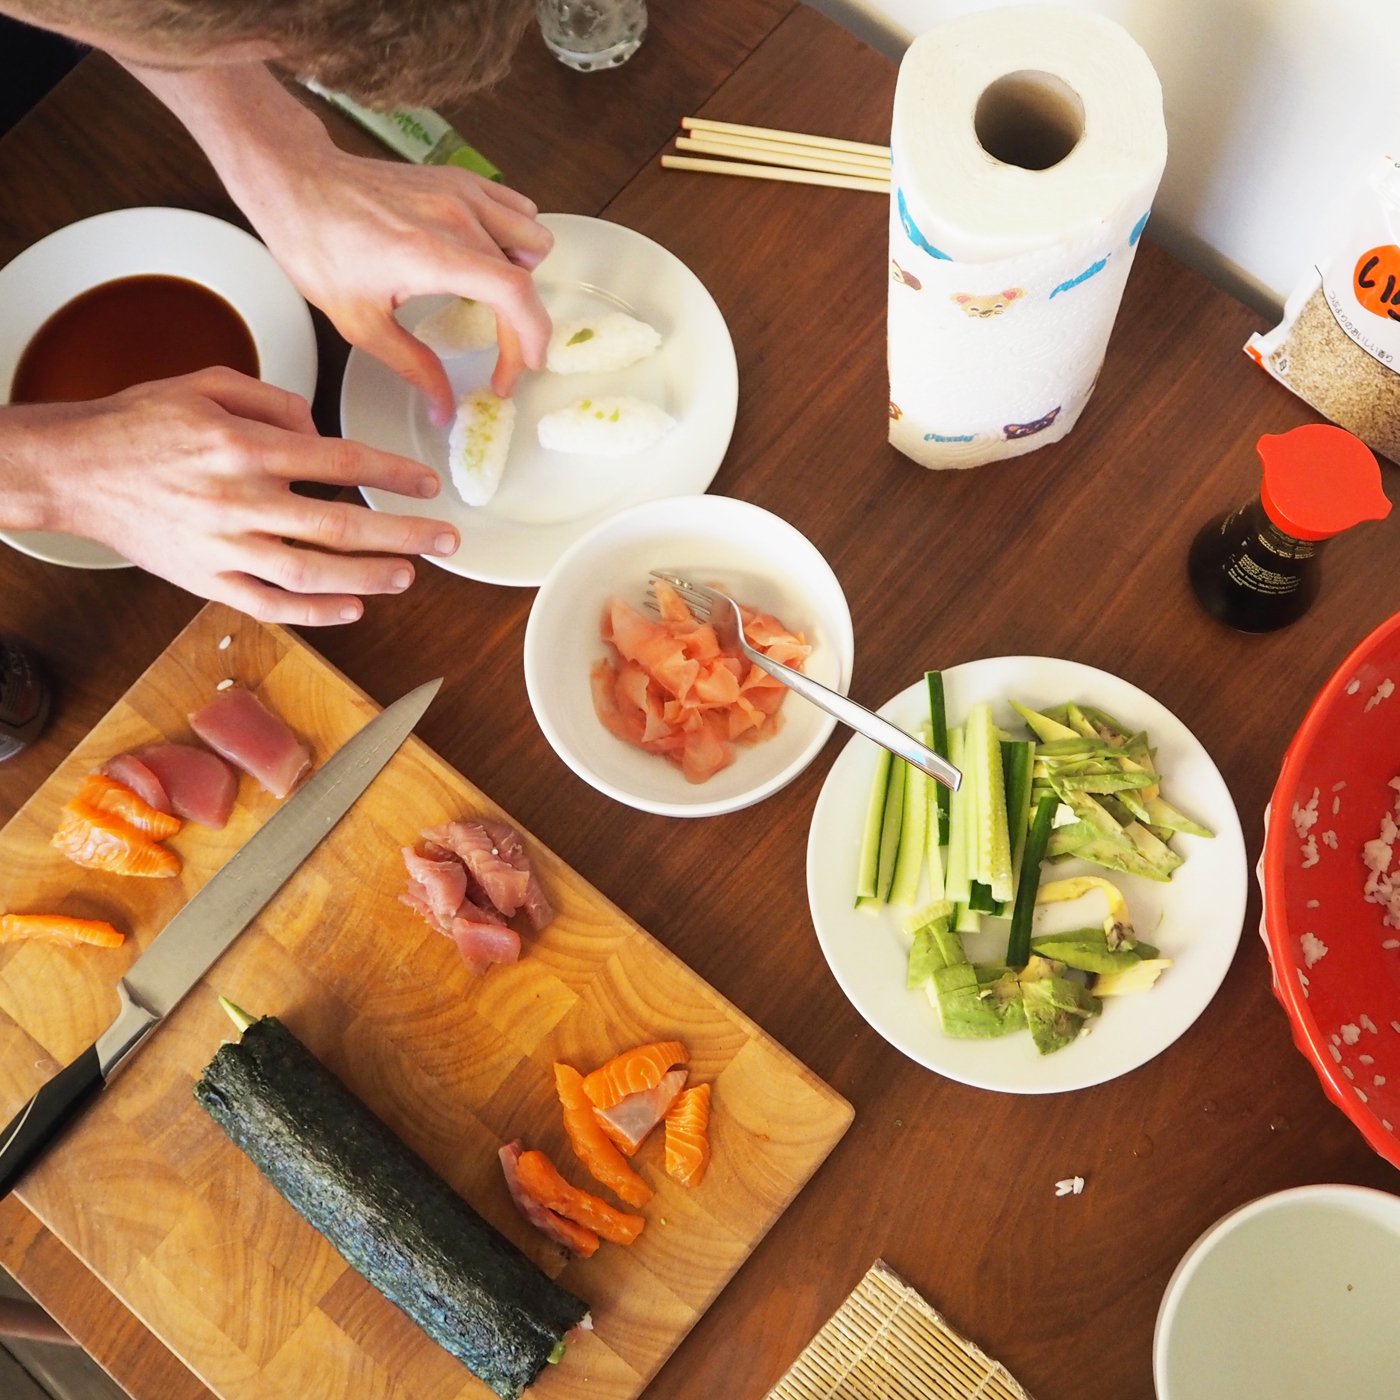
The only thing left to do was to buy our fish and vegetables.

On Saturday morning, we headed down into Crouch End and made a stop at our local fish mongers. Here we purchased a small piece of tuna and some salmon. Next door is our local green grocers where we bought a cucumber and avocado. It's great to shope local where we can, and support small businesses.
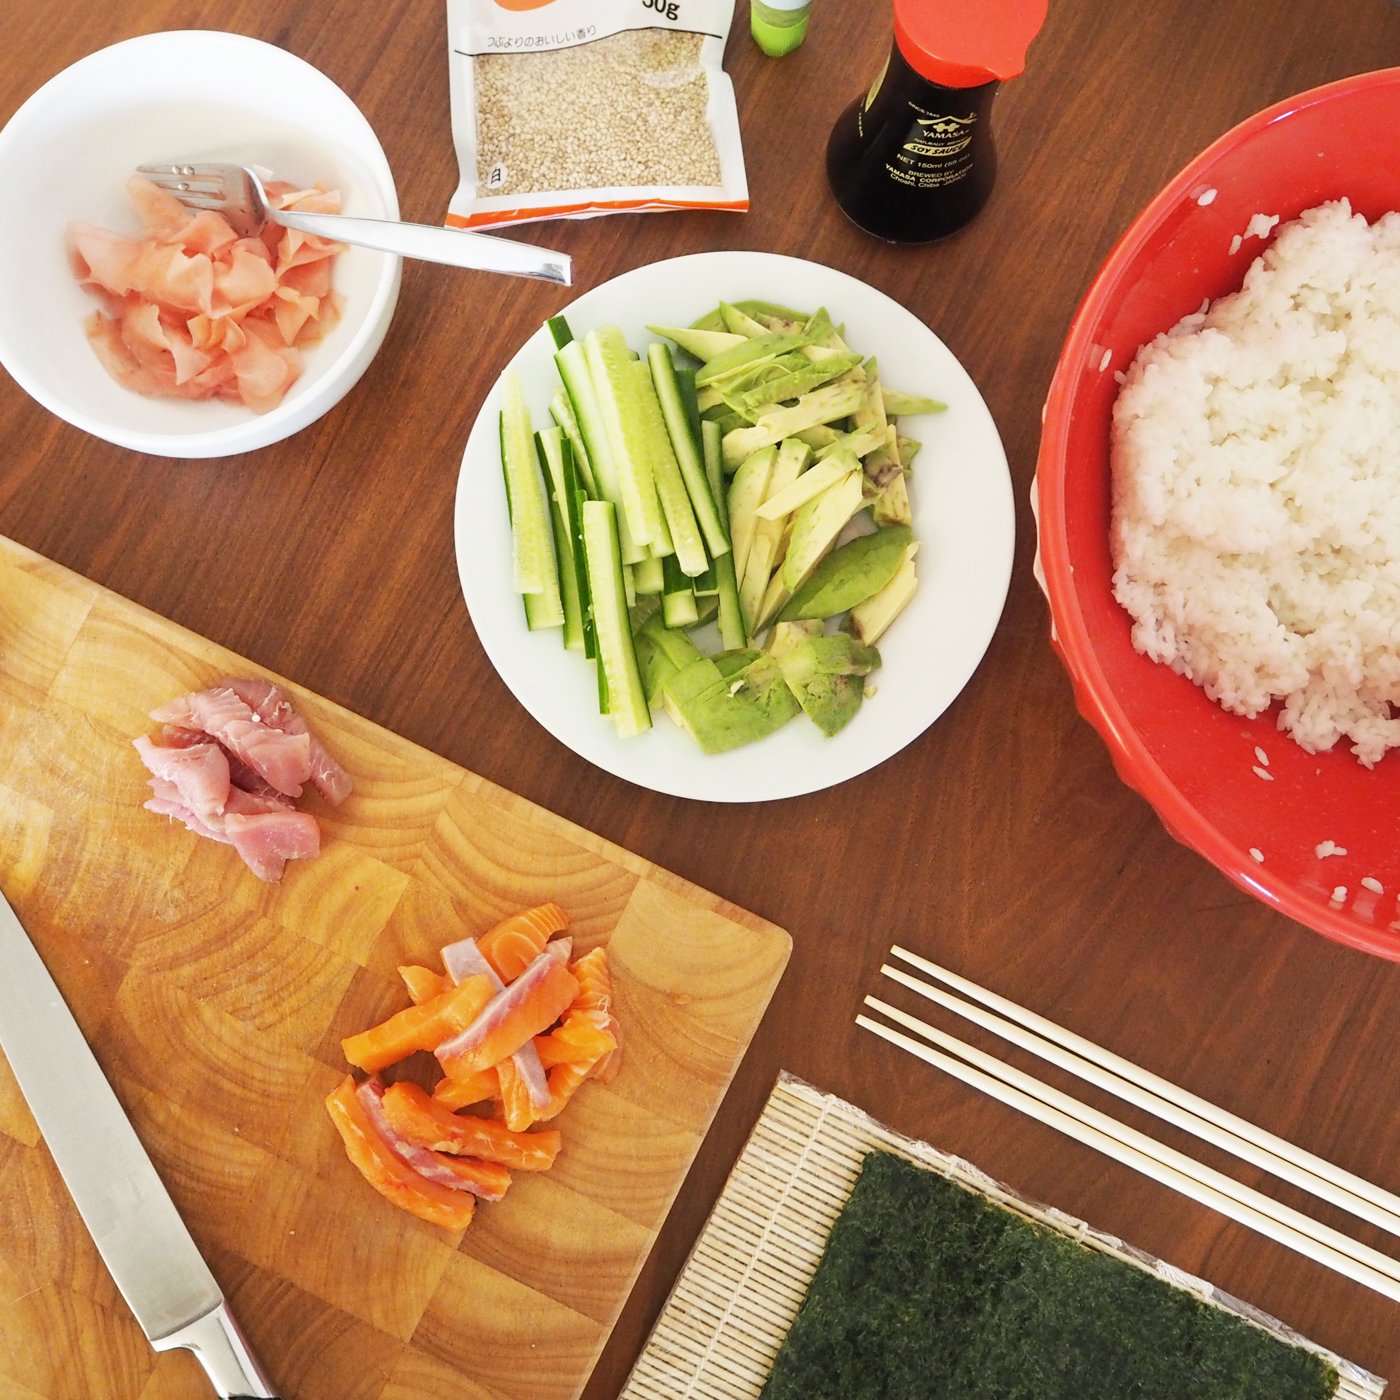
Stew cut the tuna and salmon into reasonably thin strips, leaving some slightly thicker pieces to use for nigiri.
It's really best to follow the packet instructions on the sushi rice to get it perfectly cooked, as it is different to long grain white rice. In terms of quantity we used 2 cups of rice and this was plenty! In fact it was far too much for 3 large rolls and 6 pieces of nigiri. So I would recommend maybe using 1.5 cups, or fattening your rolls out with more rice.
 When it comes to making your sushi rolls, it's best to wrap the mat in cling film. This not only makes it easier to roll the sushi, so it doesn't stick, but it also means you can throw the cling film away and not have to worry about cleaning or damaging the beautiful wooden mat.
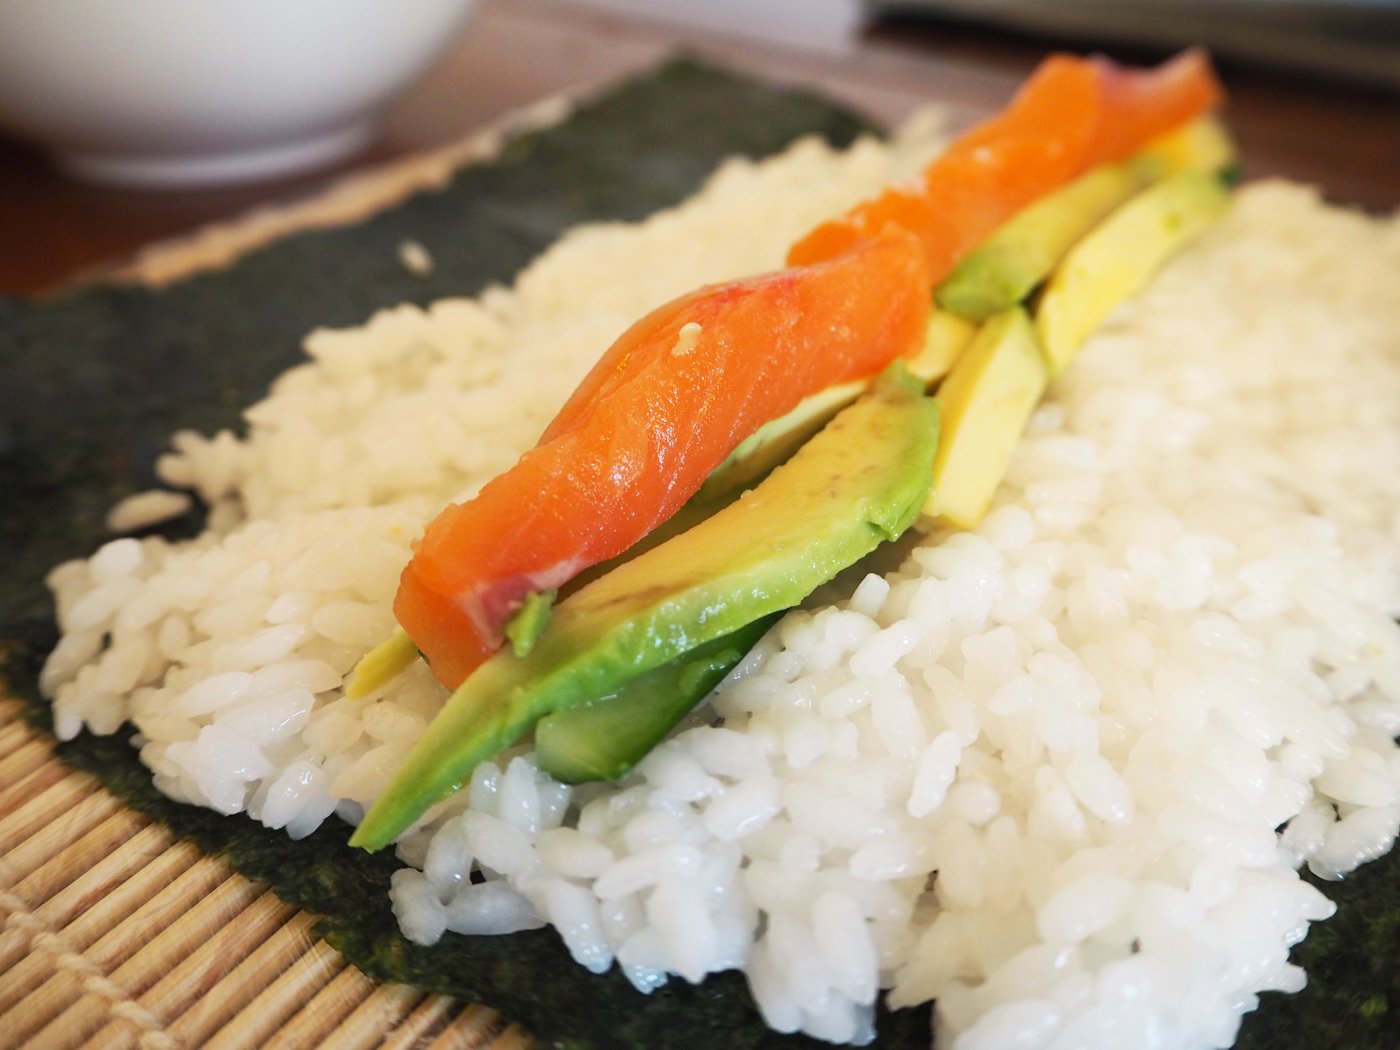
You should always put the seaweed shiny side down - both sides are shiny but if you look in the light you will be able to tell which is shinier. Again this means it won't stick and is much easier to roll with.
You ideally want to put your rice up to about an inch from the end, filling right out to the edges. We could've got closer to the edges on ours, as it meant we had an overhang of seaweed. The first one is always trial and error though!
Be sure to have a bowl of water on hand to wet your hands between each handling of the rice as it's extremely sticky and will stick to you.
Make a small dent into the rice to pop in your filling. We chose salmon, avocado and cucumber. But you could get more fancy if you wish! And don't forget to add a drop of wasabi. Depending on how spicy you like it you can go big or small, however we did find that this wasabi was much hotter than some of the sushi you buy in the supermarkets. But we love a kick!
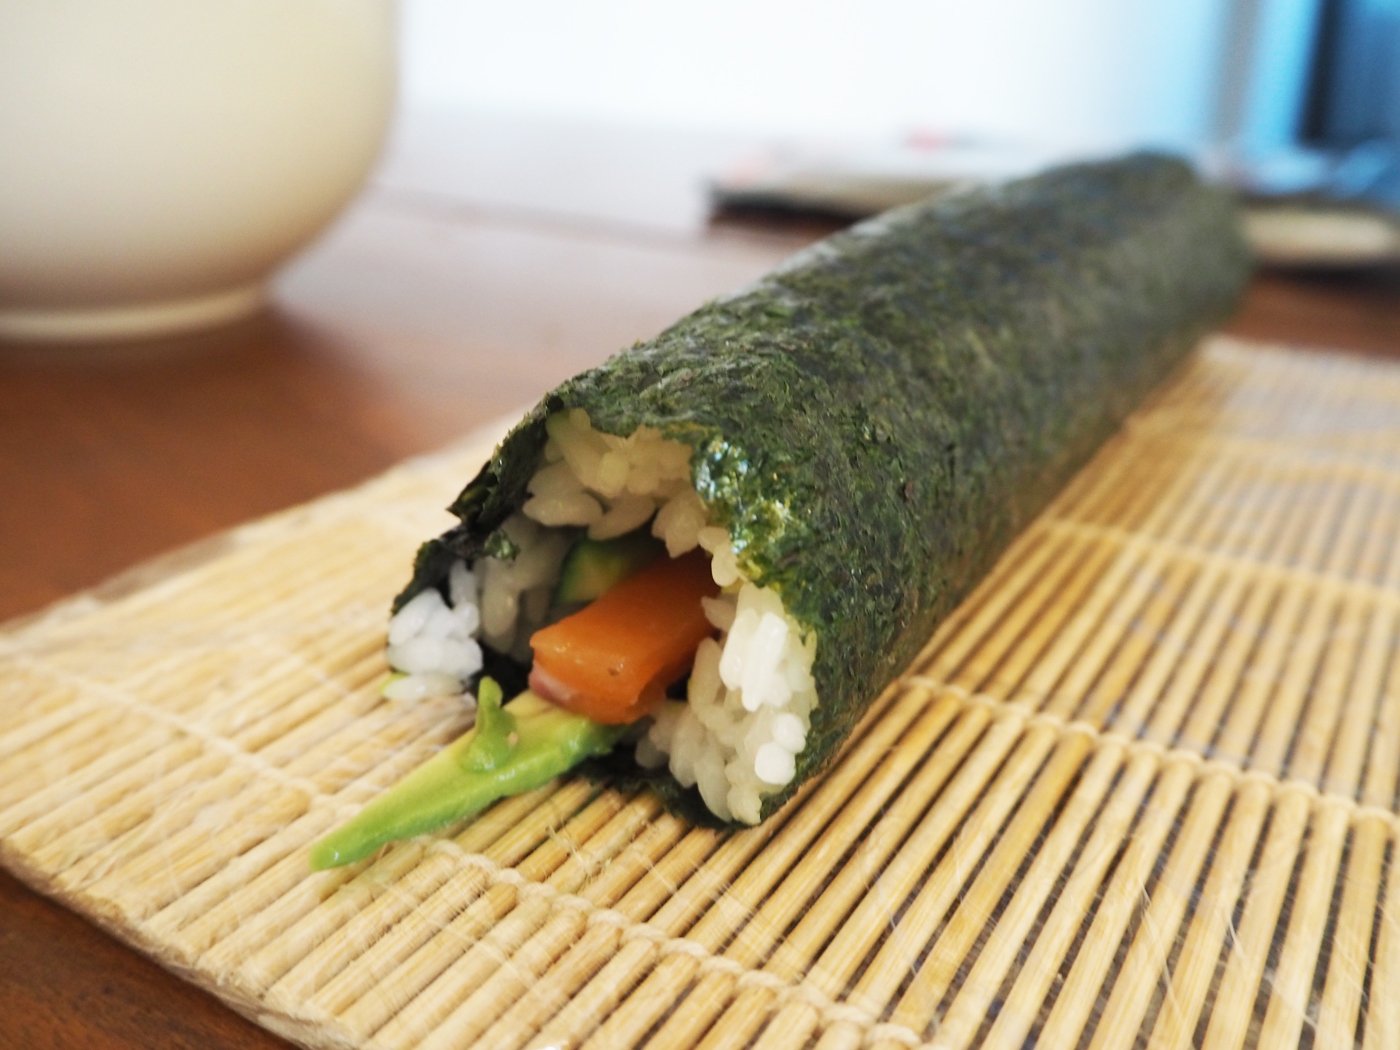
To roll, you want to grab hold of the mat and gently lift it up, being careful to not let all the filling slip and fall as you roll. You can rock the mat back and forth if you think the seaweed is sticking. Don't be afraid to apply pressure to get your rolls nice and tight.
As you move with the mat the sushi will roll and then to finish it off, gently wet the end of the seaweed that was left uncovered, to stick it to the roll and close it off.
To make nigiri you simply need to wet your hands, get a small amount of rice and gently firm into a rectangular ball shape. Place a dab of wasabi on top and then add your tuna or salmon.
The sesame rolls below were a little more tricky. For this you want to do exactly the same as you did before with the rice, and then sprinkle with sesame seeds. You then need to flip it over face down onto the mat. To do this we took the mat out from underneath the seaweed, placed it on top and flipped the entire thing over, so that no rice flew off.
You then add in your filling and roll in the same way. If you feel the rice is sticking to the mat, gently rock it back and forth again.
Similarly too earlier, we could've added a lot more rice to this one as it was a little gappy in places, and I think a thicker layer of rice would've helped keep it's shape. It all kind of went a bit skewed when we sliced it.
You want to leave your sushi rolls for 5 minutes before attempting to cut them up. This helps the ingredients stick together and makes it easier to cut. Also you want a sharp large knife, and we found it was good to keep wetting the knife in between each cut, as it can get stuck to the seaweed and rice a little.
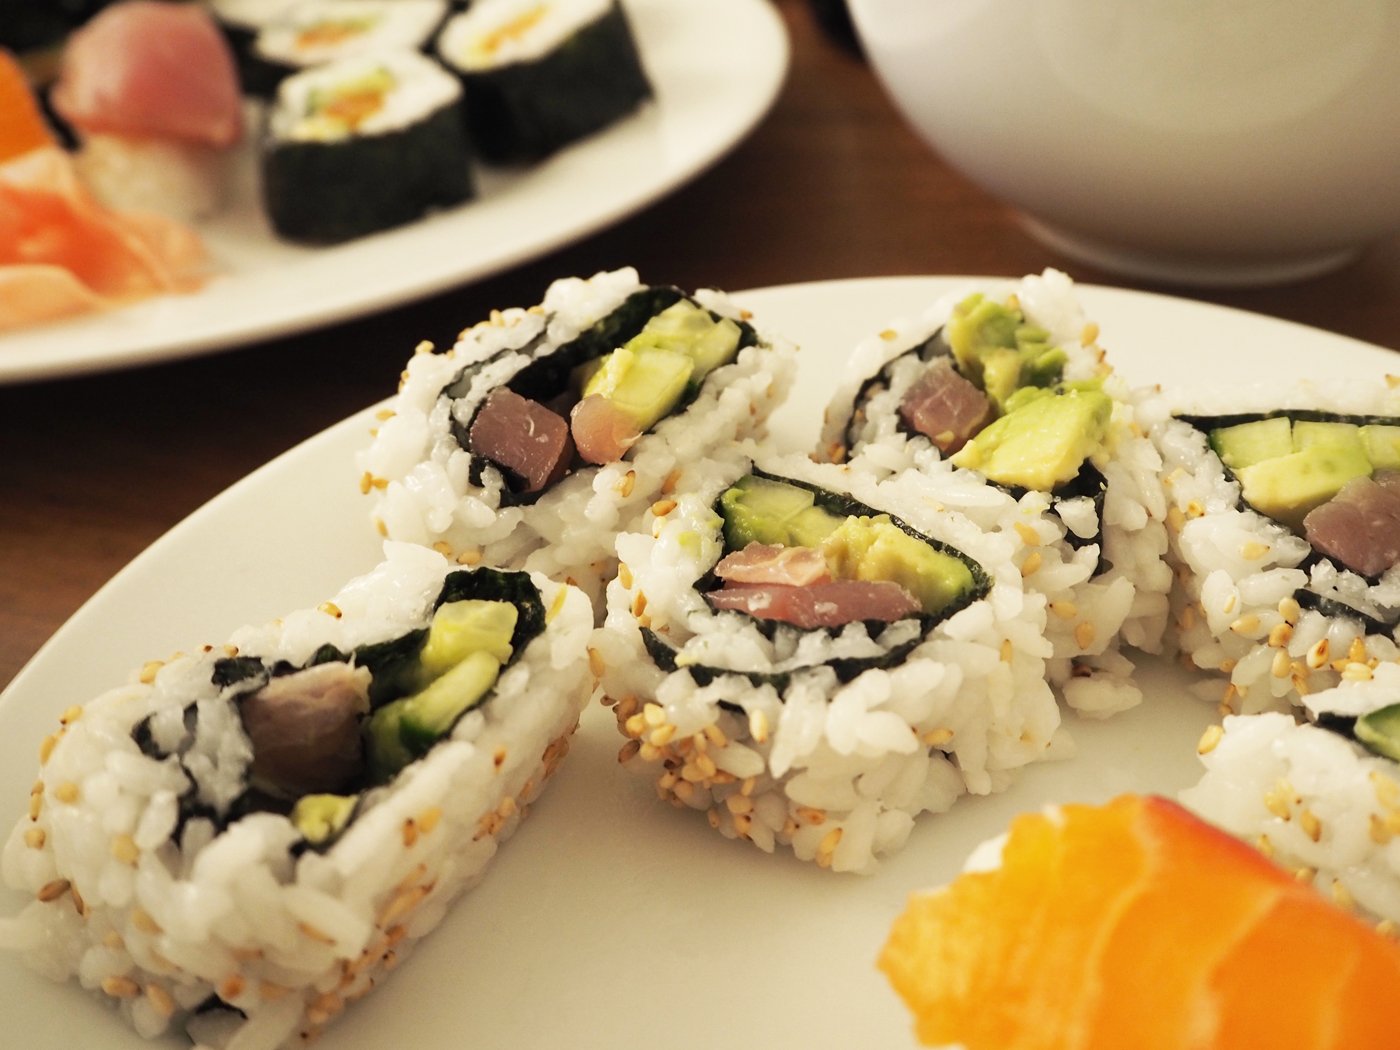
And there you have it, homemade sushi!
This week's post isn't so much a recipe, as it's super easy with the kit. But I hope that my tips and techniques may help you :)