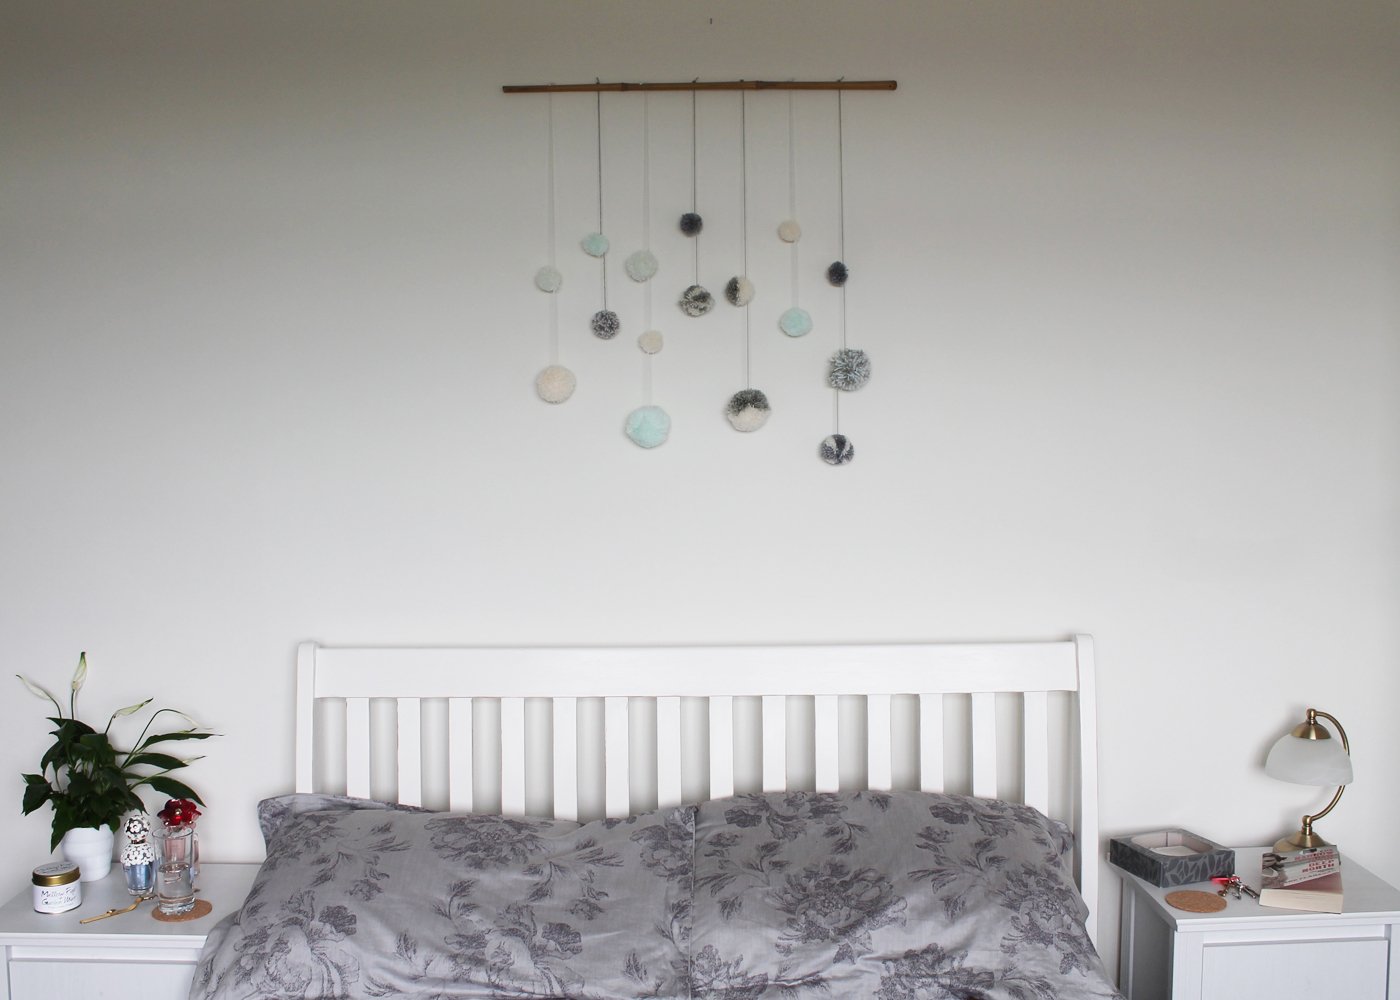
DIY Pom Pom Wall Hanging

So I have to admit, I totally stole this idea off the beautiful Caroline. Her DIY posts have me pinning images every week. I don't know where she finds the time to do so many, but they're all so good, and super easy to replicate. If you're into a bit of crafty DIY, you have to check out her blog Burkatron :)


Caroline's post is pretty self explanatory, and there's hundreds (quite literally) of similar step by step guides to be found on Pinterest. But for those of you who might think this looks hard, I thought I'd produce my own step by step guide.
I bought my pack of wheels, to create the pom pom shapes from Amazon for just £3 and I picked up the balls of wool for a £1 each from our local indoor market. The bamboo stick that I attached the pom poms onto was something my Dad had lying around, as Dad's do. But you could easily find a similar twig in your local park I'm sure haha. Finally, the invisible thread was bought from the market too, for around £1. So it's a super cheap decoration.
I chose quite minimal colours, to match our white and grey bedroom, with just a touch of mint. However, if you want to inject some colour into your space, you could go for something more bright like Caroline's.
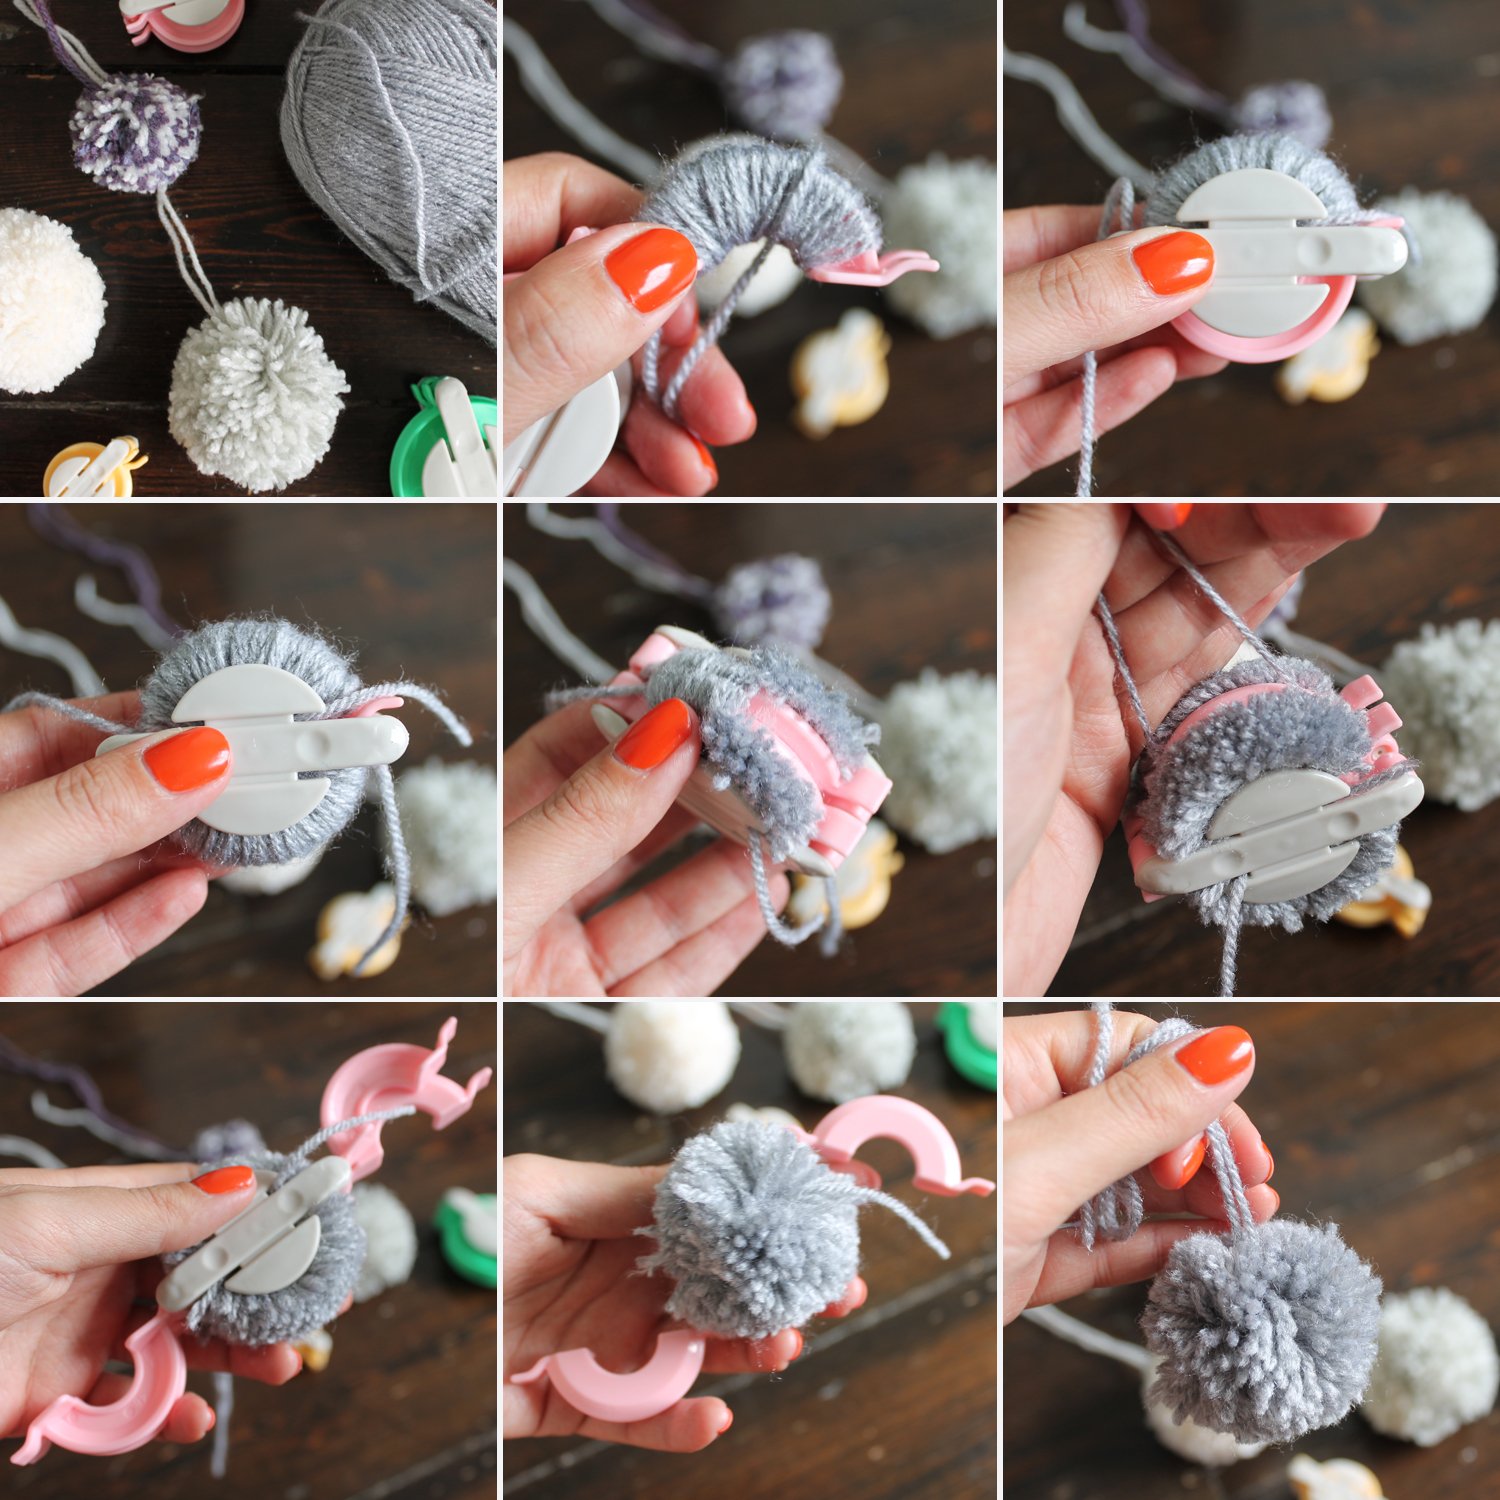
Step 1. Open up one side of your wheel and wrap the wool around it tightly, moving backwards and forwards across the length of the arc, to create a fat and full pom pom. If you want to create a speckled one, you can wrap two or three different colours of wool around the arc at the same time, in the same way.
Step 2. Close the arc of the wheel, and do the same on the other side.
Step 3. Carefully snip the wool in the middle of the arc of the wheel on each side.
Step 4. Open up both sides of the wheel, and tie a thread of wool tightly around the middle, knotting it in place. You will want to make this a long piece of wool, as this is what you will tie on to your piece of wood. So depending on how long you want the hanging, it's best to leave more wool, than not enough.
Step 5. To create multiple pom poms on the same piece of wool hanging, you simply tie them on to the same piece.
Step 6. Once you have all your pom poms, and are happy with the layout, tie them on to your bamboo. You can do this by simply tying them around the wood, or if you have a handyman Dad like mine, get him to drill tiny holes through the wood for you to thread through and not. This create a more seamless design.
Step 7. Tie invisible thread around each end of the wood and bring up into a point in the middle. Hammer a small tack into your wall, and hang the invisible thread over it. Simple!
You can also use pom poms to tie around presents, instead of using ribbon. Or I have previously used them to pad out/decorate the inside of gift boxes, instead of using lots of tissue paper.
Each pom pom takes only a minute or two to make, so you can go wild and make hundreds! I have loads left over that didn't make the hanging, but that I'll use for gift wrapping instead.
Hope you liked this post. I haven't done a DIY post in so long, but I used to love doing them on my blog :)