IKEA Play Kitchen Hack
This Christmas our son was on the cusp of turning two and we had seen many photos of him at nursery, happily playing with an IKEA wooden kitchen, so we decided to buy him one as a Christmas present.
I loved the idea of surprising him on Christmas morning with a wooden toy kitchen, wrapped in a big bow, with all of the accessories. Now he's at an age where he can start to appreciate Santa and Christmas, it was magical seeing his whole face light up!
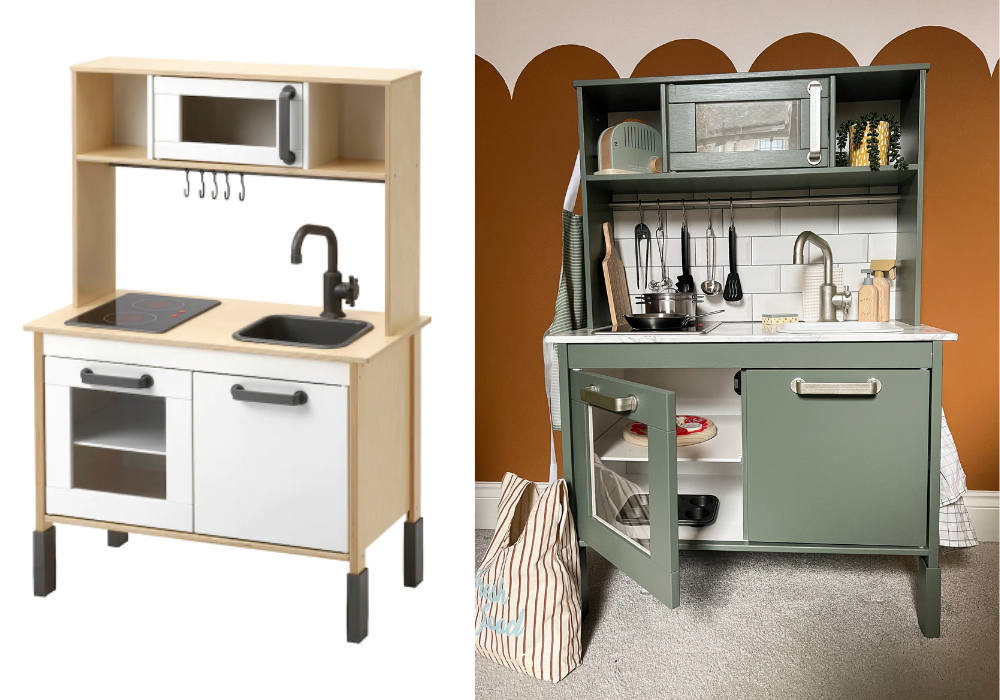
So a couple of months before Christmas, I collaborated with my Dad on my idea to not only purchase the IKEA Duktig kitchen, but to upcycle it! To put our own unique stamp on it. My Dad was a little dubious at first, but after scrolling the internet for other DIY blog posts, I was able to bring him on board.
I outsourced the project to my Dad because not only is he the proudest grandparent, always looking to do something special for his first grandchild, but he's also a dab hand at DIY - especially painting. He's decorated my parents house countless times over the years, and has more recently applied his skills to other people's homes. He would never admit it, but he's fantastic at painting. He has the patience that I could never posess for such a job. He's a perfectionist!


IKEA Duktig Kitchen Hack
Choosing the right paint colour
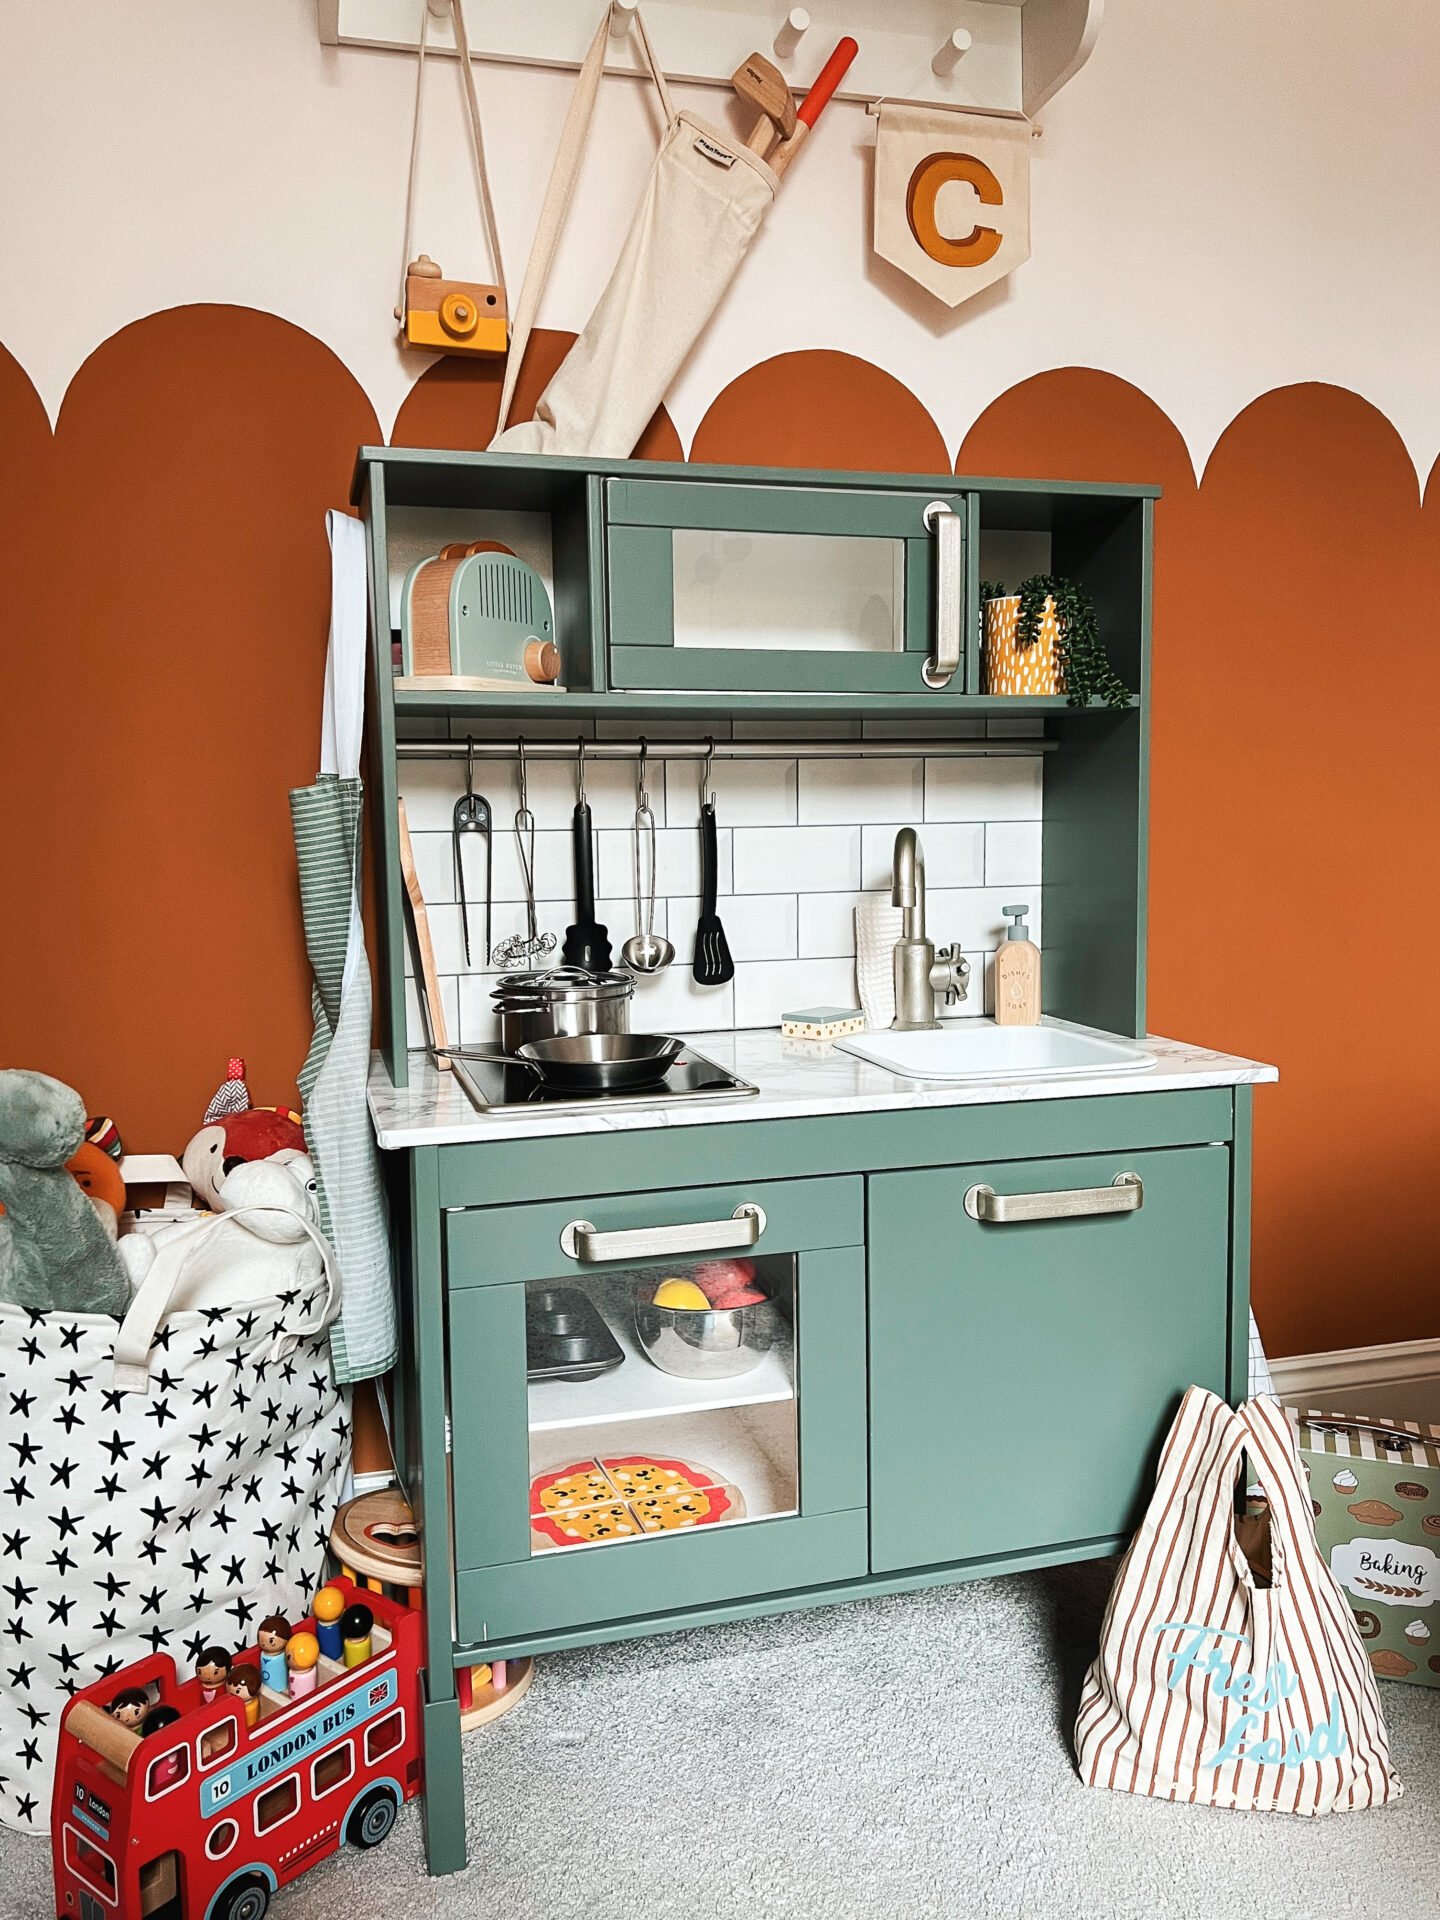
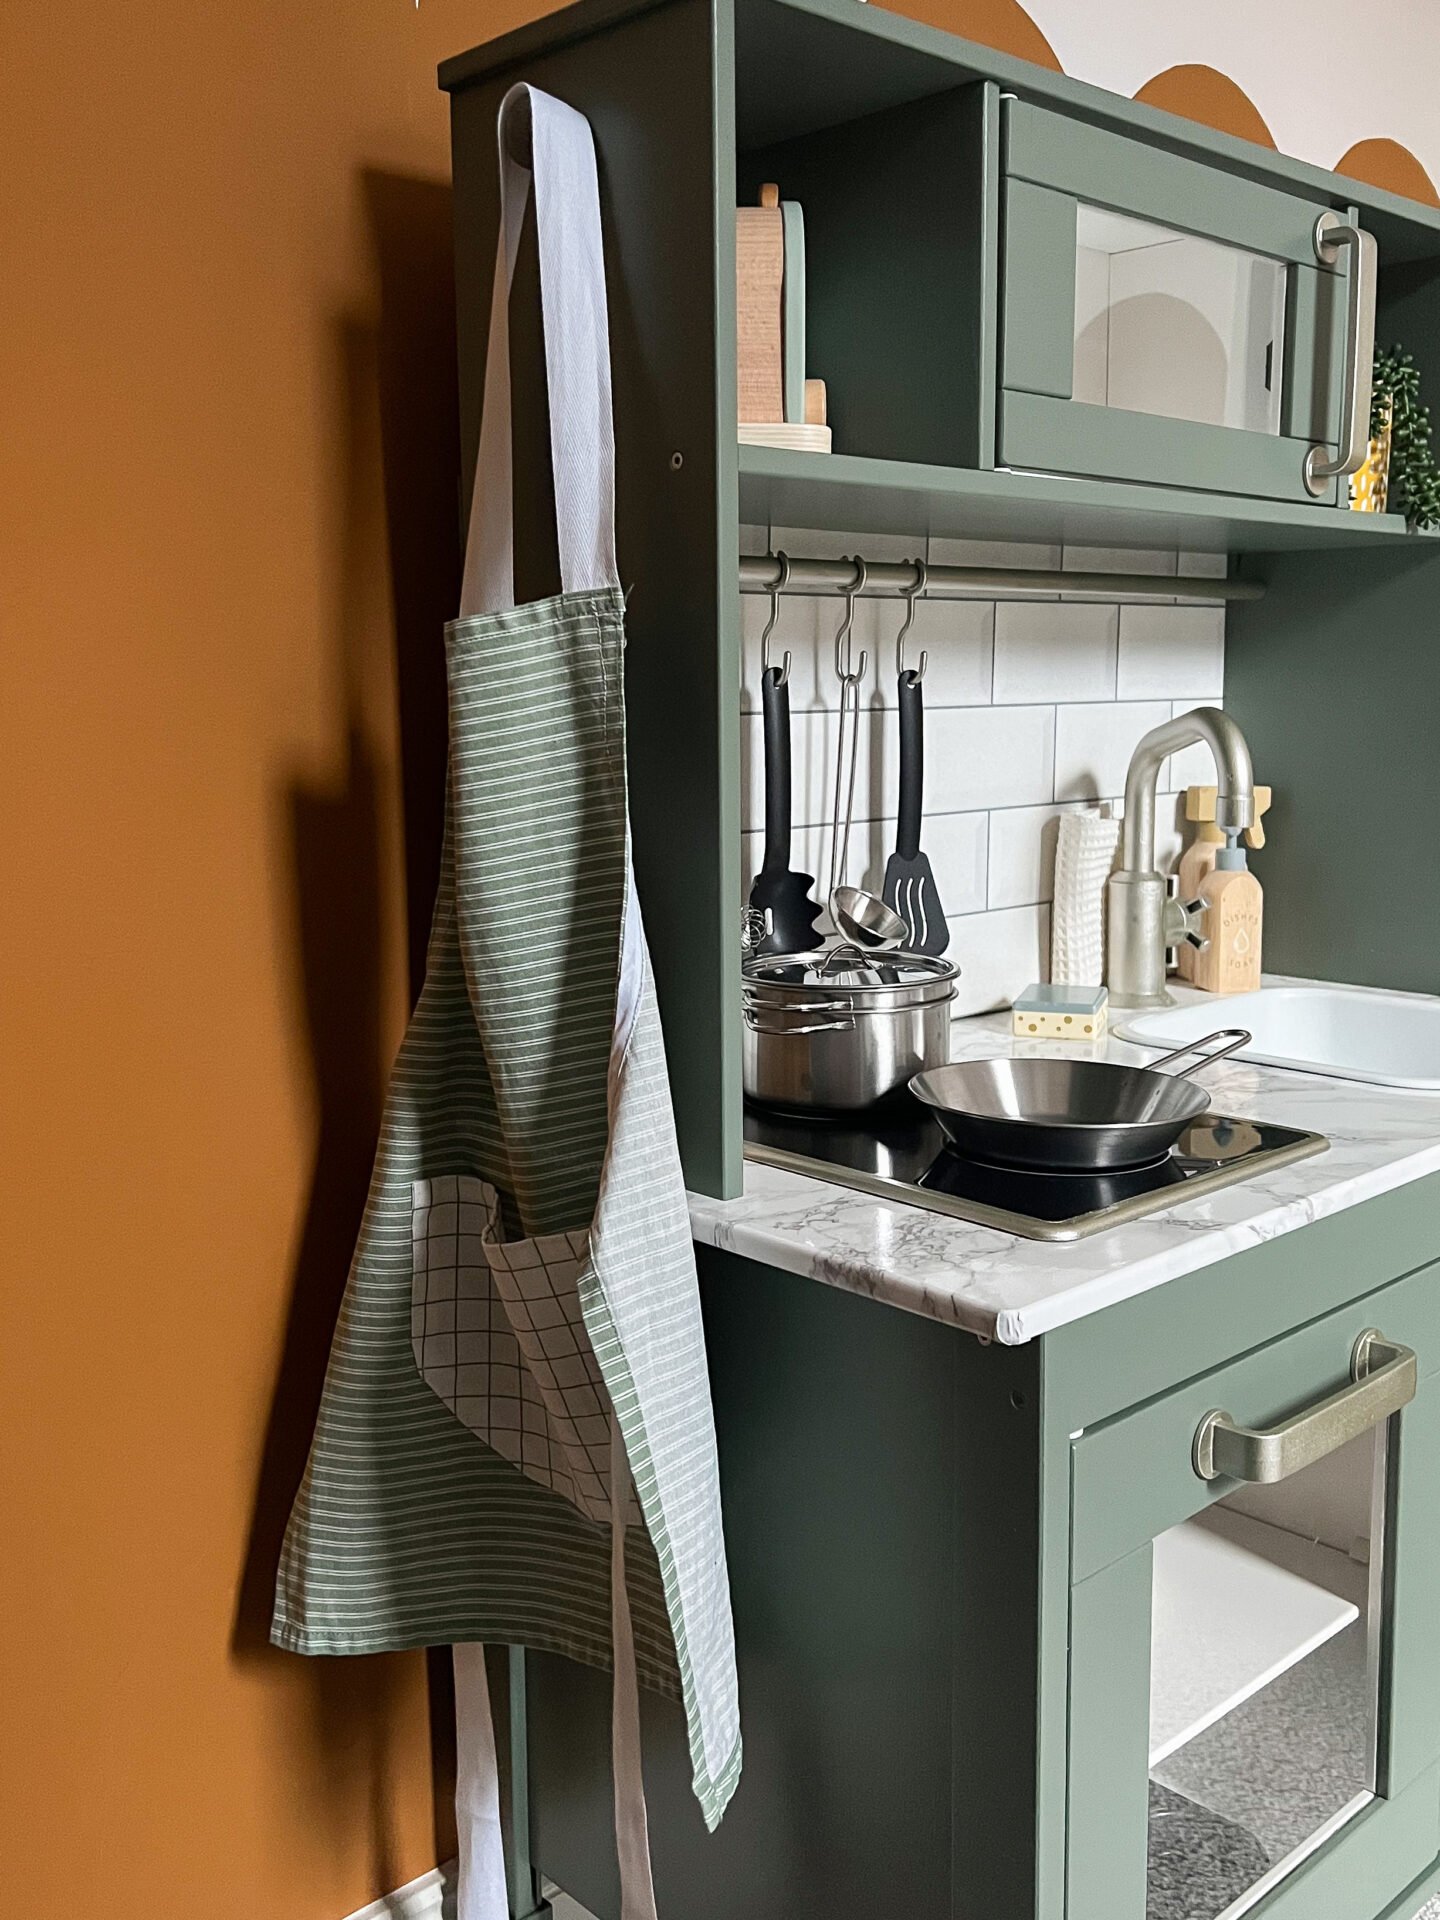
So that was that part sorted, now I just had to figure out exactly what I wanted the kitchen to look like. I flip flopped between green and blue as the main colour, before eventually landing on 'Pullman Green' by Craig & Rose. Looking back, it's the perfect compromise between green and blue - a very deep green, almost charcoal, with a hint of blue.
Spray paint for the hardware & sink
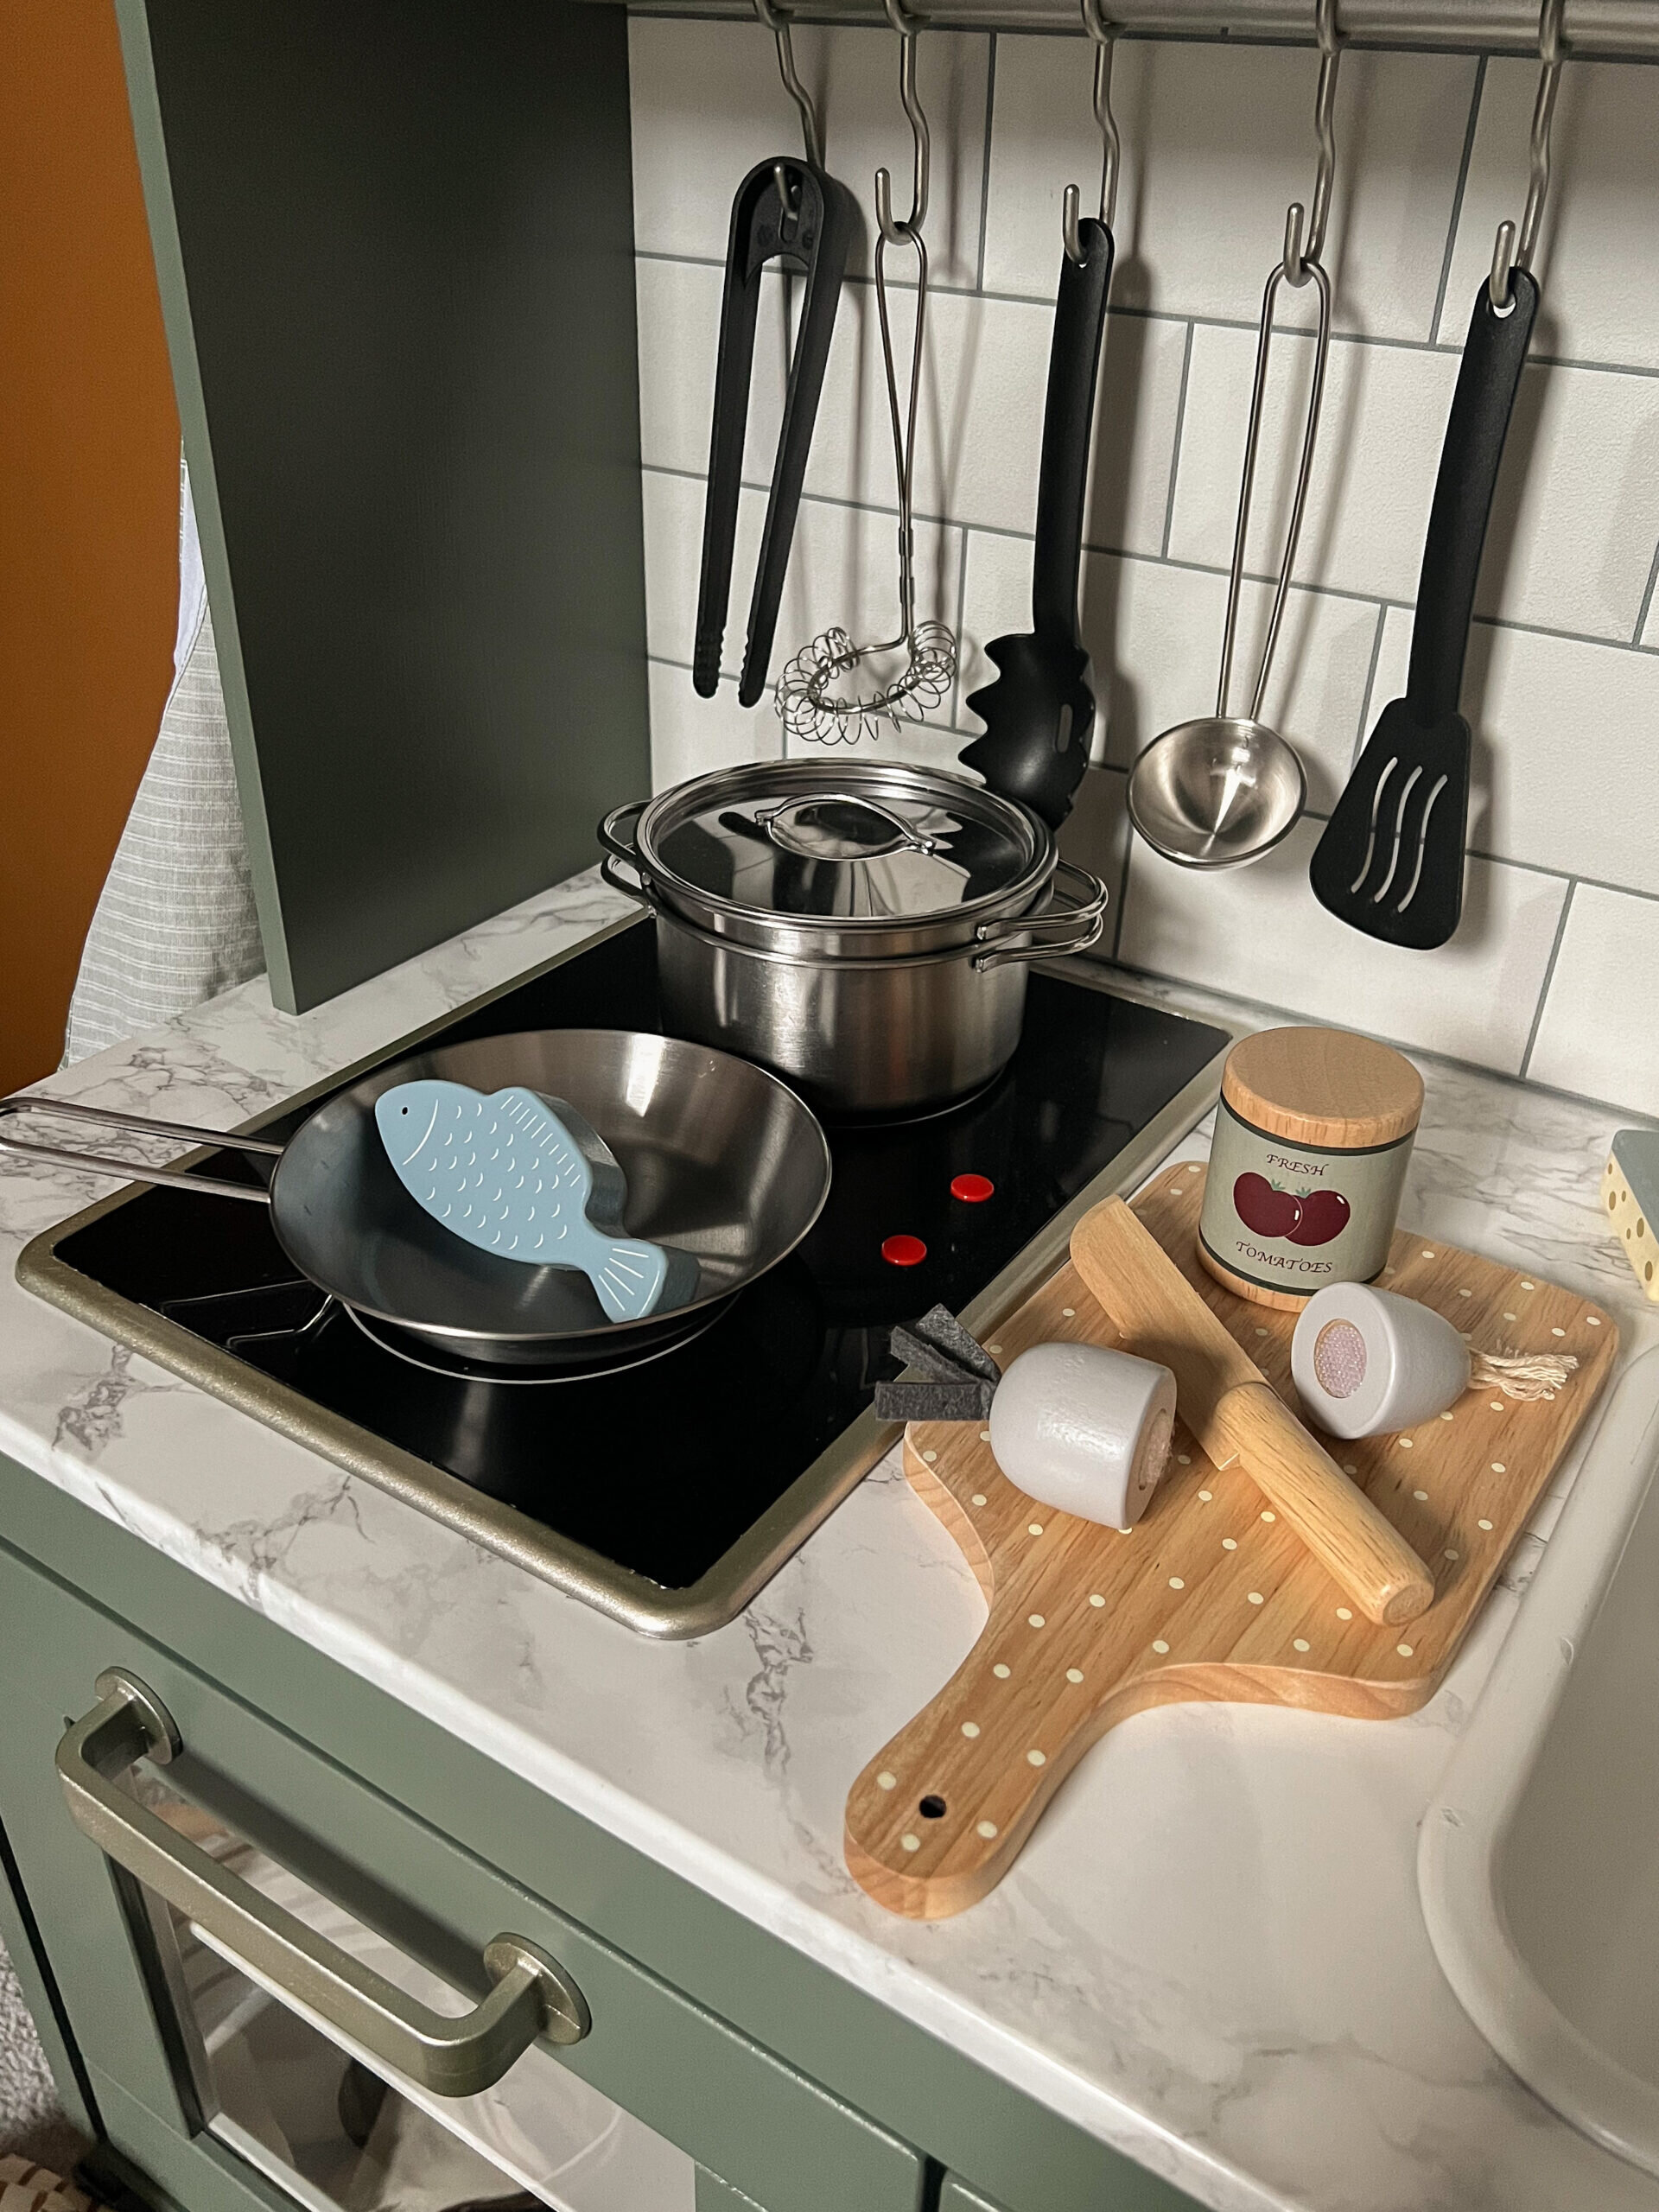
I knew I wanted brass hardware to match our own kitchen, however I couldn't find a good colour. Everything was either too gold or too yellow. I eventually ordered this 'Champagne' spray paint by Wilko, as I'd also read in multiple blog posts that spray paint was the easiest way to paint the handles and taps.
I also knew I wanted to paint the sink a gloss white, to make it look more like a sink, and to match our own Butler sink. I also bought this from Wilko - just a simple white gloss spray paint. Thankfully all the parts of the IKEA toy kitchen come unassembled, so you can paint everything before assembling!


Vinyl worktop
Finally, to again make it look more like an actual kitchen, but in minature form, I chose a marble vinyl for the countertop and a metro tile splashback. These are the two greatest hacks of the entire project. The marble vinyl was also bought from Wilko. They didn't have any available online but had a lot in store. I'm glad my Dad was the one to attach it though... As you can imagine, vinyl is incredibly adhesive. Meaning there's not a lot of room for error. Thankfully my dad removed the hob and sink first, measured the countertop up and very carefully attached the vinyl, using a credit card to smooth out any bumps as he went. His top tip? Move slowly, doing a little bit at a time. The trickiest part was folding the vinyl around the corners. Unfortunately there's not a lot you can do here to make it perfect. We toyed with the idea of cutting a thin strip to go around the edge to hide any imperfections. But in the end, my Dad simply folded the vinyl around the edges as best he could. It's not perfect, but it's certainly better than any attempt I could've made!
Metro tile splashback
Finally, the splashback! My favourite part. We have sage green metro tiles in our kitchen, so I knew I wanted to create the same look for his wooden play kitchen. However, as we were already painting the main frame green, it made sense to go with a white tile. Unfortunately the IKEA Duktig kitchen doesn't come with a back. (This seems like a big oversight on their part). So once again, my Dad set to work figuring out a hack to create one.
He attached a sheet of MDF, cut to size, starting from the base of the cabinets, right up to the top of the microvwave and shelves. By making it taller, it meant that he was able to tack it to the existing frame, and it strengthened the entire play kitchen.
The metro tiles themselves are infact wallpaper! I can't take credit for this genius idea. My good friend Katy suggested it. Both Homebase, Dunelm and B&Q stock it. You need to do a little DIY, as the roll is not the same width as the kitchen. It's smaller, so my Dad had to cut two pieces and carefully line them up, as if wallpapering an actual wall. Thankfully he had the foresight to ensure the join was directly behind the tap. This means it's essentially hidden unless you get very close.
IKEA Duktig kitchen hack before and after
With a little accessorising, (we also bought the IKEA stainless steel pan set, IKEA utensils and a variety of other bits), it's come out looking like a real kitchen. I'm so pleased with the overall effect!
I should also thank my Mum for her incredible sewing skills, who made both the apron, oven gloves and tea towel out of two H&M tea towels I already had!
Our son was so excited to find it waiting for him on Christmas morning and has played with it almost every day since. So it's really been a great gift. Being 2 years old, he's of an age where he understands more about the kitchen. He will pretend to use the tap to fill a cup, making a water noise, and he will pop something in the microwave and make a beeping sound when it is done. It's wonderful to see his imaginative play come to life.
Top Tips:
Paint everything before assembly.
Spray paint the handles, tap and any other hardware.
Use wallpaper as splashback - it's easy to find and apply.
Don't rush it! Patience is key when painting and assembling.
Except that it will get marked - some of the tap has peeled off and I've had to use Tipex to cover some marks on the sink, but actually I'm surprised at how well it's lasted so far.
Related Posts